Difference between revisions of "ATV520E"
From MyGica
(Created page with " right '''The ATV1200''' '''Operating system''' Android 4.2.2 '''Power''' 12 volts '''CPU''' Am...") |
(→Firmware & Re-flashing) |
||
| (5 intermediate revisions by the same user not shown) | |||
| Line 2: | Line 2: | ||
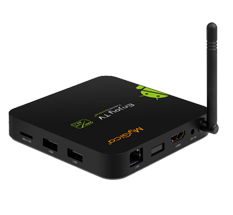
[[file:Atv520E.png|right]] | [[file:Atv520E.png|right]] | ||
'''The ATV1200''' | '''The ATV1200''' | ||
| − | '''Operating system''' Android 4 | + | '''Operating system''' Android 4.2 |
| − | '''Power''' | + | '''Power''' 5 volts |
'''CPU''' Amlogic A9 | '''CPU''' Amlogic A9 | ||
'''Memory''' 1GB DDR3 | '''Memory''' 1GB DDR3 | ||
| − | '''Storage''' | + | '''Storage''' 4GB |
'''Graphics''' Mali400 | '''Graphics''' Mali400 | ||
'''Sound''' A/V, HDMI, S/PDIF | '''Sound''' A/V, HDMI, S/PDIF | ||
| Line 20: | Line 20: | ||
== Firmware & Re-flashing == | == Firmware & Re-flashing == | ||
| − | To upgrade your Box to latest version of OS Click here [ | + | <youtube>L1OtAzULyDI</youtube> |
| + | |||
| + | |||
| + | To upgrade your Box to latest version of OS 4.2 Click here [http://bit.ly/ATV250E] | ||
| + | |||
| + | == | ||
| + | |||
| + | <youtube>JGgjabigiCI</youtube> | ||
| + | |||
| + | to update to OS 4.2.2 [http://bit.ly/ATV250E] | ||
== Cache Wipe Failed == | == Cache Wipe Failed == | ||
Latest revision as of 17:12, 5 July 2016
 The ATV1200
 Operating system          Android 4.2
 Power                     5 volts
 CPU                       Amlogic A9
 Memory                    1GB DDR3
 Storage                   4GB
 Graphics                  Mali400
 Sound                     A/V, HDMI, S/PDIF
 Connectivity              IEEE 802.11 b/g/n  10/100 Ethernet
Bold text
Contents
User Manual
For Manual please Click here [1]
Firmware & Re-flashing
To upgrade your Box to latest version of OS 4.2 Click here [2]
==
to update to OS 4.2.2 [3]
Cache Wipe Failed
Here is yet another 101 video on how to master reset your MyGica ATV1200
Why Hard Reset:
1. If your box is not functioning properly
2. Having a lot of issue with your apps
3. WiFi is not connecting
4. screen freezing a lot
5. You want to give the box to someone for good and want everything wiped
Enabling Developer Options
1. First Select Settings.
2. Scroll Down and Select Developers Option
3. Select USB debugging, and Click ok
XBMC shrank, or not full-size display
We have Video Walk through for this too


